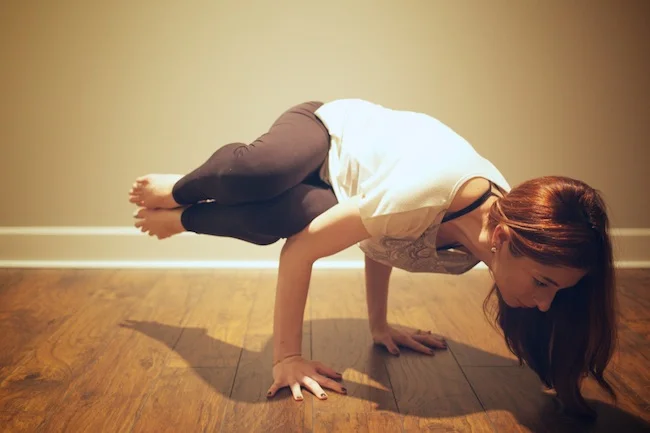
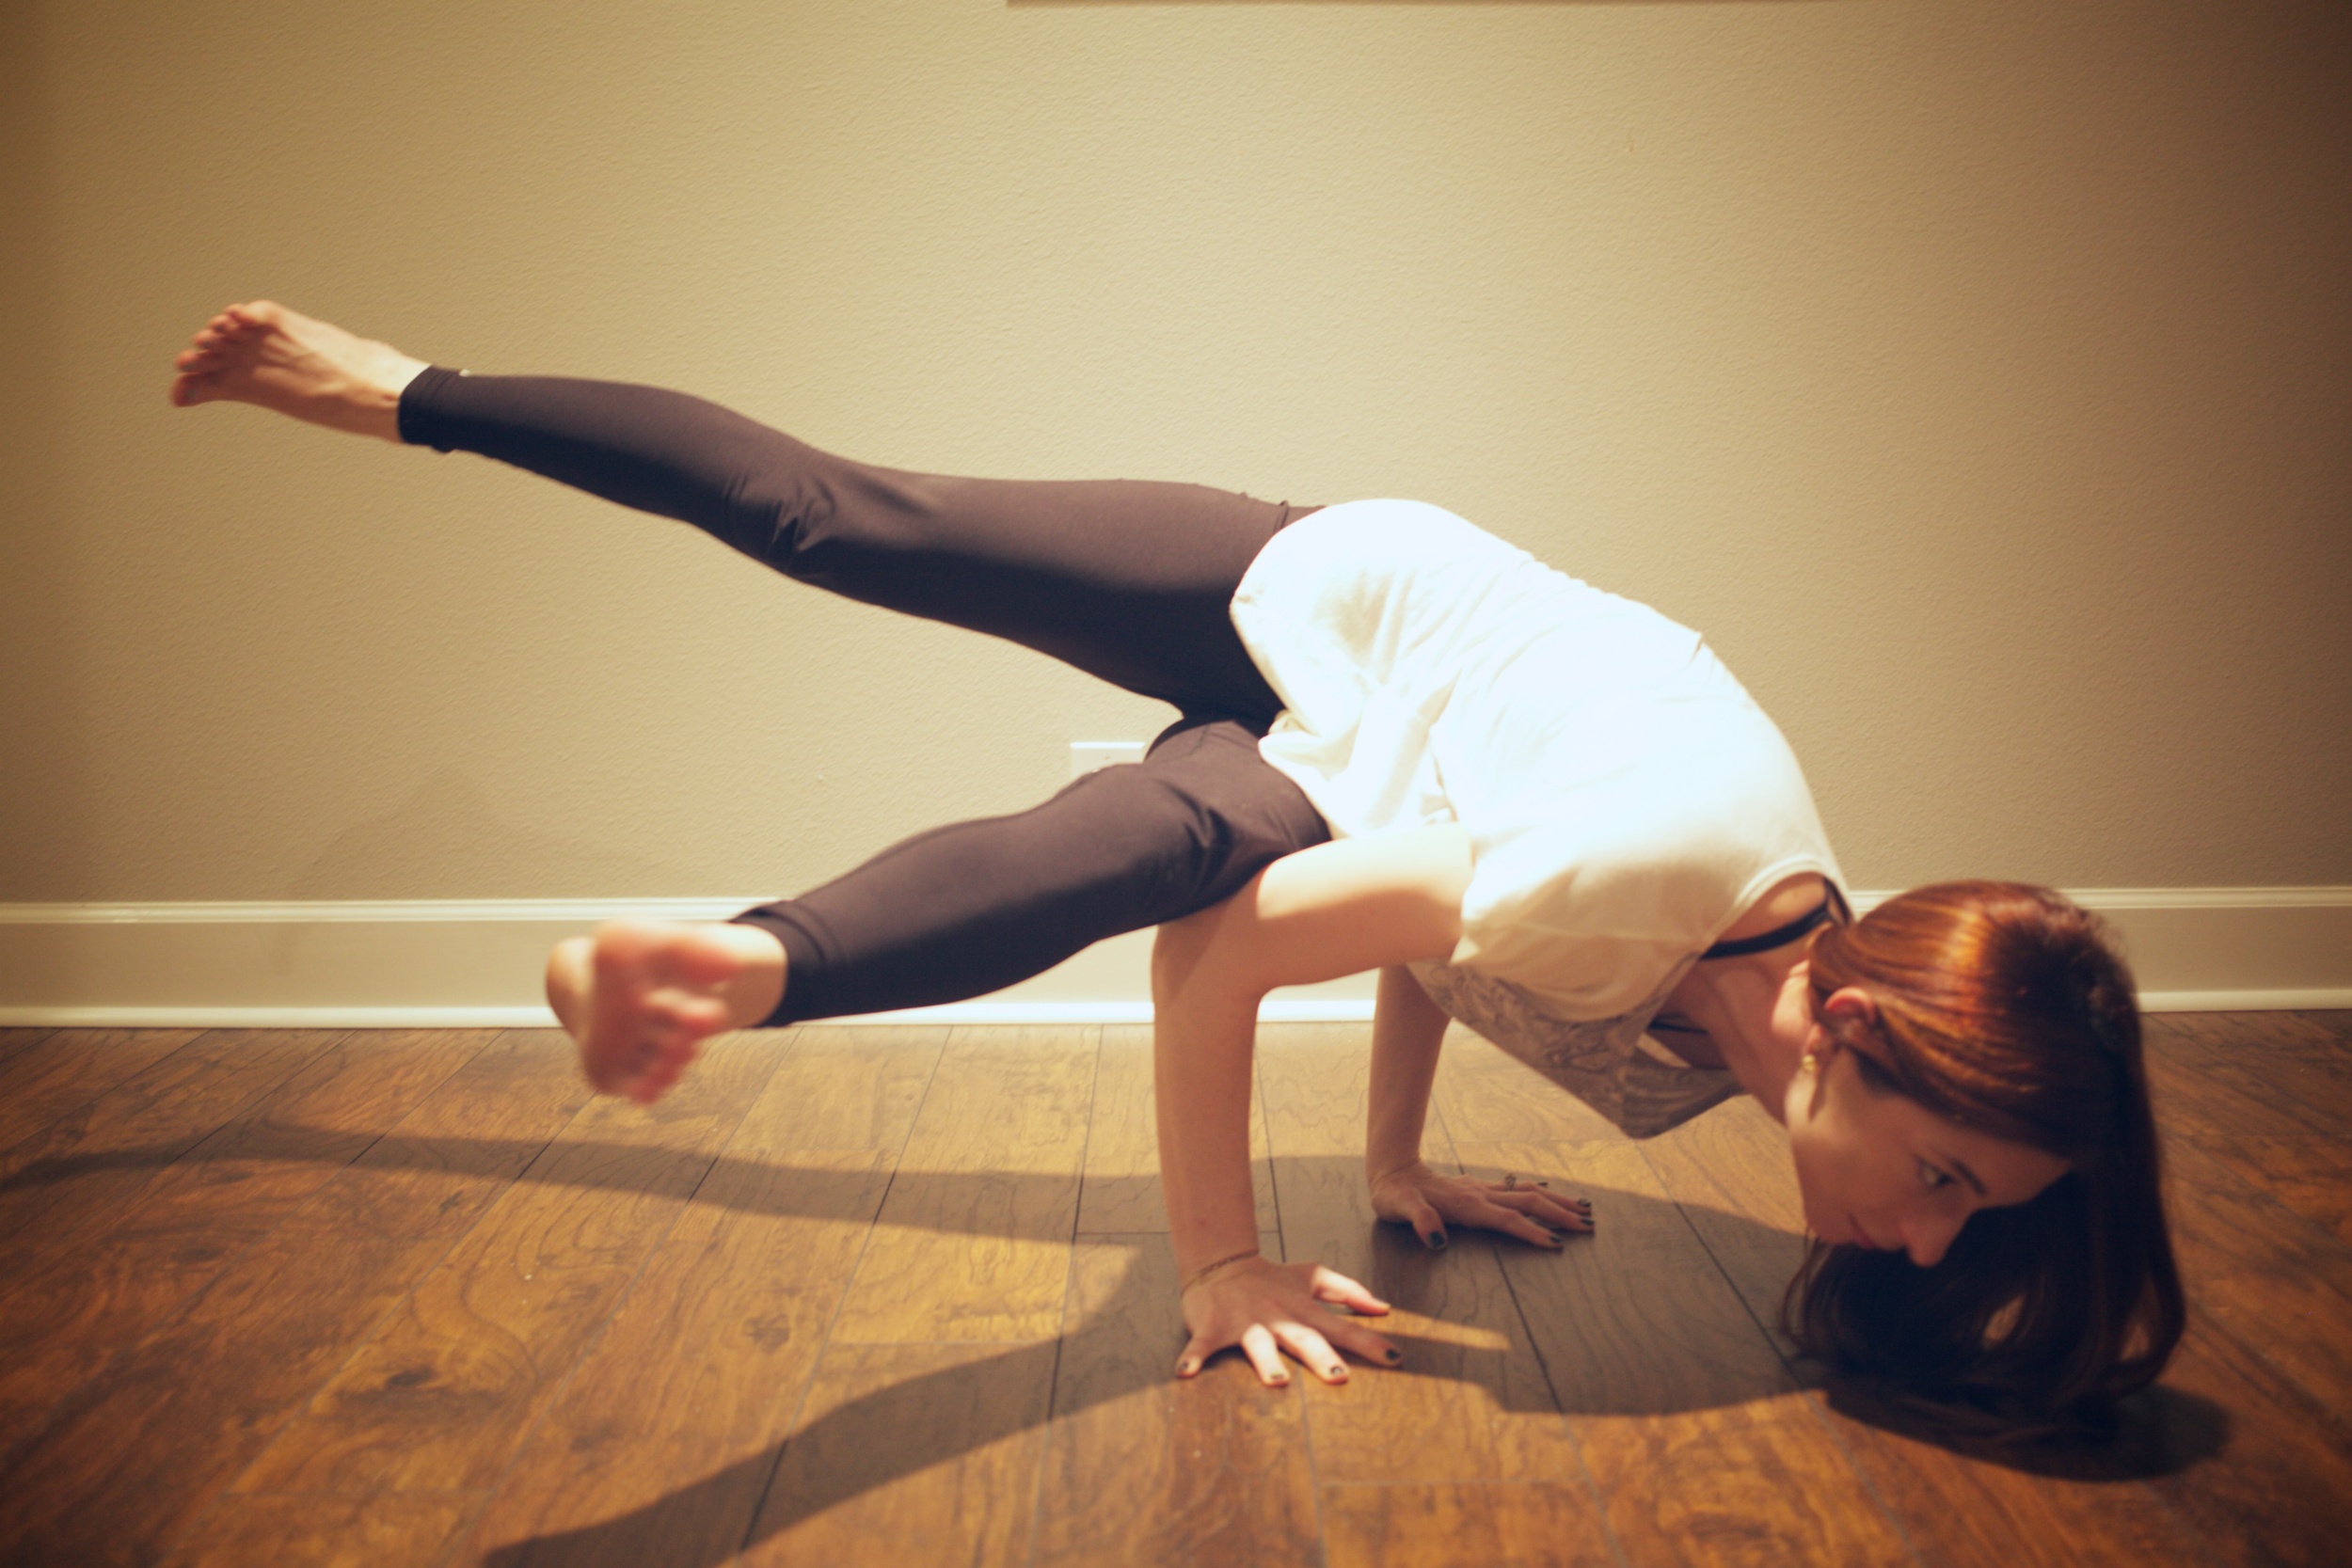
Thanks to my wonderful yoga instructor, I was able to get into a full side crow pose on my first (well, almost) try. It was incredible; something I have pinned the junk out of and wished to learn was actually attainable. Hand stands are still a hot mess that need mass amounts of work, but crow and peacock, I have locked down.
The main reason I was able to do it, and do it well, was because of some fantastic tips Angela gave me. Let's face it, sometimes pictures and YouTube videos do not cut it. Sometimes, we need real tips from, gasp, real people who have done it before. Here are five great tips for how to get yourself into a successful side crow pose.
Read along, look at some pictures, and you will be doing a pin-worthy pose in no time!
1. Start from Mountain
Do a few vinyasas before getting down and dirty with your side crow. After 3-4, you should be warmed up and ready. Start in mountain, then forward fold so your hands are touching the ground. If your hands do not touch naturally, that is ok, just bend your knees till they do.
Next, crouch down so your knees are bent and your hands are flat on the floor.
2. Hand Positioning
Hand positioning for side crow is different than crow pose. For the left side, move your hands to the left so your left hand is next to your hip and your right hand is in front of your left knee. Again, you want to be in crouching position with palm flat on the floor and fingers spread. Every finger should have weight and be helping support that body.
3. Elbow to Hip
This is key. This is the difference between success and not-success. Position your left elbow so it is in the groove of your left hip joint. Having you elbow to hip connection right will help keep your balance when those feet come off the floor. Be sure that the right elbow is also lined up with the outside of the left knee. Both should line up so your knee and hip rest just above the elbow joint.
4. Shoulders and Fingers
It is all in the details. Be sure that shoulders are back and arms are rotated outward. This will give you optimal strength and balance. Again, fingers should be grounded; if it helps, bend fingers so the tips are pushing into the ground.
5. Lift Off
You are ready. Slowly shift your weight forward while keeping the right leg stacked on top of the left. Feet should be flexed and you should have some serious yoga toes going on. It may take a few tries, but slowly start to find you happy spot of balancing on your arms. Once you have lift off, hips should be stacked and knees and feet should be like glue together. If wrists hurt, come back down and continue doing wrists strengthener exercises before attempting again.
Feet and knees should be together and tucked into the midline. The back should be straight with those shoulders staying down. If your head elevation comes down slightly, that is ok, just be sure your face does not touch the ground.
Be sure to look 2-3 feet ahead of your on the floor. It is always better to look ahead than where you are. I think there may even be a life lesson in that somewhere ;)
Full Side Crow Pose
Once you have your balance, get ready to go into a full side crow! This may take a few tries before your are ready, but when your balance is good, give it a go!
Slowly extend the left leg out straight so that it is parallel to the floor. Be sure that your head stays even distance from the ground. Flex your foot and straighten that leg. When your balance is good here, you can begin to extend the right leg out straight behind you. In full side crow, your lower leg is the only connection to your supporting arms. Keep those arms rotated outward and your fingers grounded. And, of course, keep those hips stacked!
For best results only try once to twice a week. We want those wrists to stay healthy!


